The iOS-Only Podcasting Kit
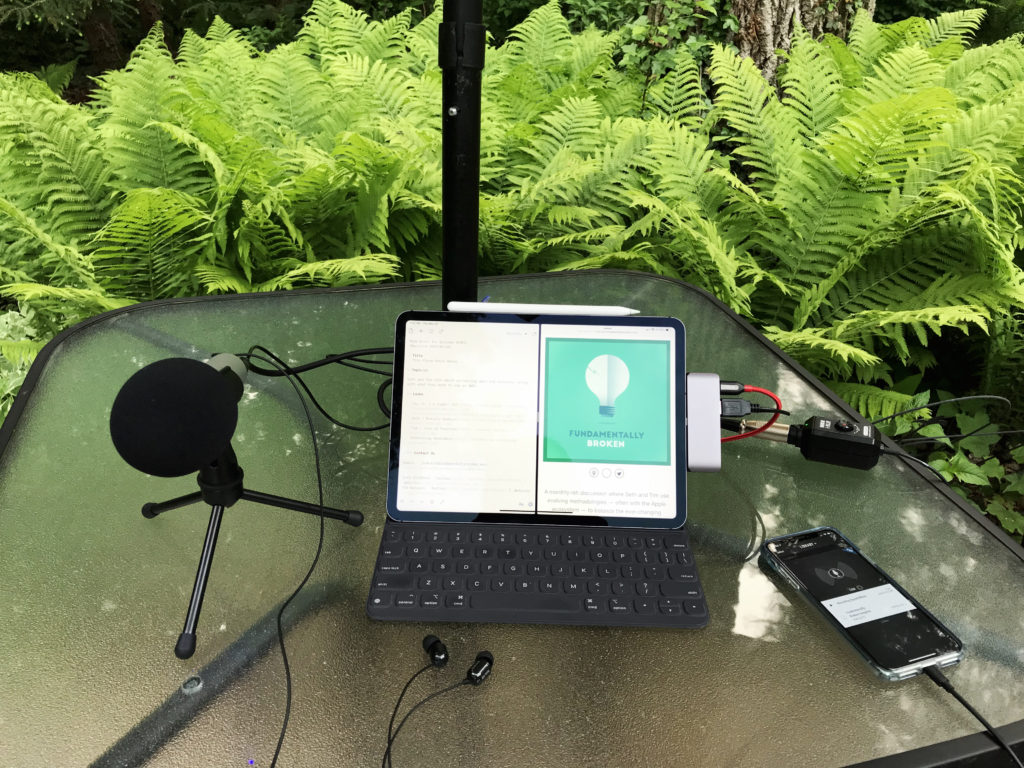
I got into podcasting late. I've been listening for years, but I never started my own. But by the time that Seth and I did, there was an emerging idea started by Jason Snell: recording and editing podcasts iOS-only. As someone who rarely ever touches a Mac for their day-to-day work, this idea has continued to gnaw at my brain. I tried my hand a couple of times at doing something differently with it, but it never panned out the way I wanted.
In an effort to head down this road, I ended up switching microphones last year: I had the clutch Blue Yeti microphone, but decided on the Audio-Technica ATR2100-USB instead. Not only was it better for the environment in which I record, but it also afforded me the possibility to record using both the USB and XLR connections, pushing me closer to the goal of iOS-only.
A month or so ago, I was recording the show via the late-2012 Mac mini I have. I ended up having an issue while recording, and I lost my audio in several spots. Given that this is one of two jobs that I ever ask it to do, I was understandably upset and put off by recording in the same way going forward. The idea of going iOS-only came back to the forefront of my mind. I again turned to Jason's setup, only to realize that this was going to cost me several hundred dollars to create. I don't have that lying around, and I wanted to find something that would work for me.
I can already record iOS-only: I can use my iPhone with AirPods to make the call and use my iPad Pro to record the local audio. This is how I recorded my end when I guested on Episode 23 of the Automators podcast. I enjoyed doing this, but I also don't have a great way of having the good audio from my mic broadcast to the other hosts. I like the idea of using the iOS devices I have to record: I'm always going to have them with me, so it just makes more sense to use them for the complete audio setup. I can use either device to record or make the call, I just need a way to get the sound of the mic to both of them. So that's where my search started. I had most of what I needed, I just needed an XLR interface of some type. Rather than search 'USB XLR interface' like I had done multiple times before, I ended up just searching for 'XLR interface'.
That's when I ended up finding something new and unique: the Røde i-XLR. This device was made for reporters, plugging into an XLR microphone and allowing mobile recording of interviews; when I saw it, I thought it might work perfectly for podcasting as well. Rather than take my XLR connection through an expensive USB interface into an XLR recorder of some type or another adaptor to my iPhone, this allows me to use my XLR connection and plug it directly into the iPhone without all the extra cables and steps. There's even an app – the Røde Recorder – which was specifically made for this microphone. The idea was intriguing, so I decided to purchase it and test it out.
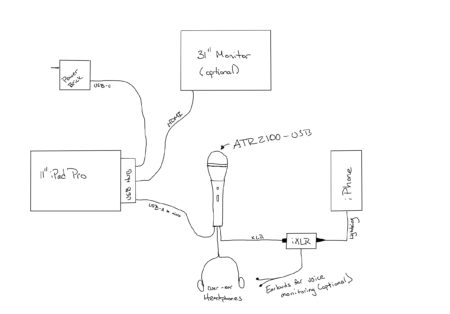
Here's how my setup is all connected, using my iPad Pro 2018 and my iPhone Xs.[1] First, I start with the power: I recommend using this Anker wall-charger, which provides a Power Delivery USB-C port along with a USB-A quick charge. I use it all the time for travel, and it's perfect for what I need. I use a USB-C to USB-C to power the iPad. Next, I connect the USB microphone cable to the iPad Pro using the Satechi hub;[2] this also allows me to use the HDMI for an external monitor and the USB-C port to power everything. Then, I connect the Røde iXLR to the end of the cable which comes with the microphone, and plug that into my iPhone directly. Finally, I connect the over-the-ear headphones to the the Røde iXLR and do a test recording to dial in the sound level for the environment. When I have that part set and I'm happy with the audio, I'll connect the monitors directly to the back of the microphone so I can use them for the audio call; I can monitor the sound visually using Røde Reporter or Ferrite. I prefer using Ferrite due to the smaller file sizes and better recording controls for volume as well as the ability to bookmark the audio when topic change and/or I cough; it helps me in the edit later. However, I have noticed that using the configuration menu in Røde Reporter allows me to use a -20 dB pad for the mic, resulting in quieter background noise and an overall better sound.
I did run into one small technical issue when getting this all set up: when the i-XLR is connected to the iPhone, the cellular radio creates an interference with the audio. To avoid this in the audio track, I have to turn on airplane mode,[3] then turn on the WiFi and then record. It's a simple issue, and one that I'm not too concerned about: I can still get calls or messages if something is urgent. I also don't want to be disturbed when I'm recording so that I can give the other person (or people) my fullest attention possible, so it's a non-issue for me.[4]
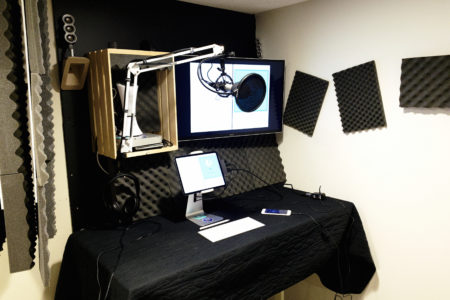
For home use, I have my microphone on a Neewer boom arm,[5] which allows me to keep it at the appropriate level when I'm standing. I also have the iPad Pro in a stand and use the Magic Keyboard to type because I had it at home; you could use any wireless keyboard for this, and in the future, I might just pull the trigger on a Brydge Keyboard for my 11" iPad Pro, but I'm waiting for more reviews to come in to make the call. I may also look to improve my home setup with a mute switch, but I'm going to hold off for now.[6]
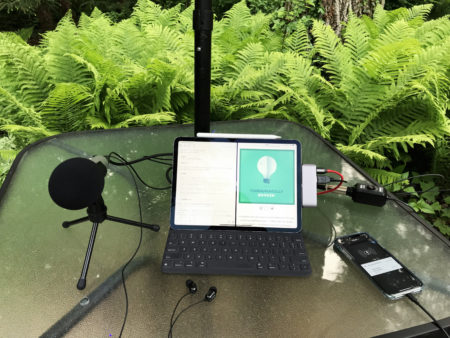
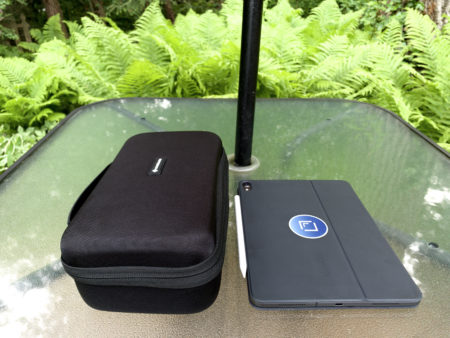
With a few more additions, not only can I have an iOS-setup at home, I can also have a completely mobile setup as well. I can start recording more often, no matter where I am: whether it's traveling for work, going to my parents house on a short weekend trip, or taking a long-overdue vacation, I can record from wherever I am. I bought some inexpensive in-ear monitors and some duplicate cables, which complete the mobile setup. It all fits into a hard-side case made for my specific microphone, and the entire case fits in the bottom of my travel backpack, meaning I can go anywhere and record.
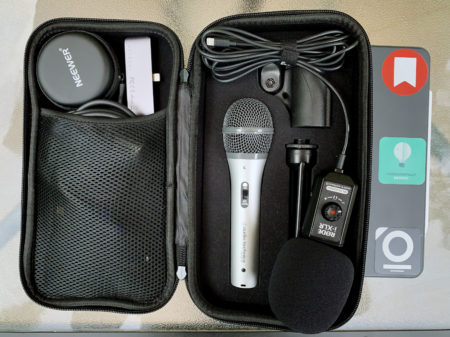
From here on out, I'm going to be recording iOS-only using this setup: my iPhone will record my local audio, and my iPad Pro will handle the call. The only bit that I don't have is the recording of the call itself, which isn't a big deal to me as long as the people I'm recording with know what they are doing. This setup allows me to use my iOS devices which have shown to be more dependable than my Mac mini. I find my new setup option to be better for the actual running of the show: I can have my iPad Pro in split screen to handle show notes in Drafts, Safari to do any real-time look-up, and the call in slide over on Skype; if I'm using FaceTime, I can simply just jump back to the call if I want by tapping the green indicator in the upper left of the screen.
This setup works surprisingly well. The audio quality is completely fine for anyone who's not a die-hard purist with bottomless pockets. I've been testing a lot with it and can't notice a difference in what I've been producing in the past. I'm trying to do this for as little as possible. For someone who has an iPad and an iPhone, you can have a complete setup – for both home and travel – for around $400 all-in, including all of the chargers, cables, usb hub, interface, and microphone.[7] It's even less if you already have chargers or a USB hub. You can even expand the setup over time, making it the most versatile setup out there.
I think this is the best part of the mobile setup I've created: I don't need to have more wires and boxes costing me hundreds of dollars more. I will always have my iPhone and iPad with me, so this just makes more sense. It also helps make my setup portable, making my mobile setup that much better. So while I impatiently wait for WWDC to bring changes to the way I can podcast using only my iPad, I have found the best possible work-around for my uses. I'll share how I edit on iOS in my next post.
Here are the items you need to create the mobile kit with your iPad Pro (2018) and iPhone:
- Caseling hard case
- Audio-Technica ATR2100-USB Microphone
- Røde i-XLR
- Neewer In-Ear Monitors
- Cable Matters USB C to Mini USB Cable (3.3 ft)
- Satechi hub
- Anker 49.5W USB C PD + USB A Wall Charger
- Anker PowerLine+ C to C 2.0 cable (6ft)
Links to everything will be below. I use affiliate linking. Don't @ me. ↩︎
This is the hub I use which works with my iPad Pro. You can use a multitude of others, or if you have a different iPad, you can use one that works for you. ↩︎
Seth was right. ↩︎
If you have an older device laying around which supports Ferrite or Rode Reporter, you can use this as the "storage" device if you really have an issue with what I've described here. ↩︎
there is a package deal which includes the mic, a boom arm, and a pop filter that I would recommend. This wasn't available when I bought my mic. There are also other mics and stands out there. This is just what I use, and it's inexpensive. ↩︎
I'd love to see a mute feature added in Ferrite for recording in the future to negate the need of an extra box. ↩︎
The prices I'm listing are in USD. Includes tax and assumes Amazon Prime shipping for everything. You may already have the cables and everything, so it could end up being cheaper for you. ↩︎
